Set up XR Interaction Toolkit for Hololight Stream for Unity
Objectives
-
Install XR Interaction Toolkit to use with Hololight Stream for Unity
-
Configure scene to use XR Interaction Toolkit
-
Optionally customize Hololight Stream action bindings system
-
Set up controller visualizations
Set up XR Interaction Toolkit
The XR Interaction Toolkit is a package for creating VR and AR applications that leverage Unity input events for 3D and UI interactions.[1] XR Interaction Toolkit allows for number of XR features to work with your Hololight Stream application.
For more information on XR Interaction Toolkit, check out Unity’s XR Interaction Toolkit documentation.
For instructions on how to add XR Interaction Toolkit to your project, check out Unity’s XR Interaction Toolkit Installation page for more details.
Install XR Interaction Toolkit to use with Hololight Stream
-
Import the Starter Assets sample from XR Interaction Toolkit.
For more information on installing and using Starter Assets, check out Starter Assets. -
Import the Hands Interaction Demo sample from XR Interaction Toolkit.
For more information on importing and using the Hands Interaction Demo, check out Hands Interaction Demo. -
Install XR Hands.
For more information on importing and using the XR Hands, check out Install XR Hands. -
Import the Hand Visualizer sample from XR Hands.
For more information on importing the Hand Visualizer sample, check out Hands Interaction Demo - Prerequisites and setup.
| The above samples are required for hand interaction Prefabs, default input actions, and visualization assets. |
Configure scene to use XR Interaction Toolkit
-
In the Project window go to Assets > Samples > XR Interaction Toolkit > 3.0.8 > Hands Interaction Demo > Prefabs.
-
Add the XR Origin Hands (XR Rig) Prefab to the scene.
-
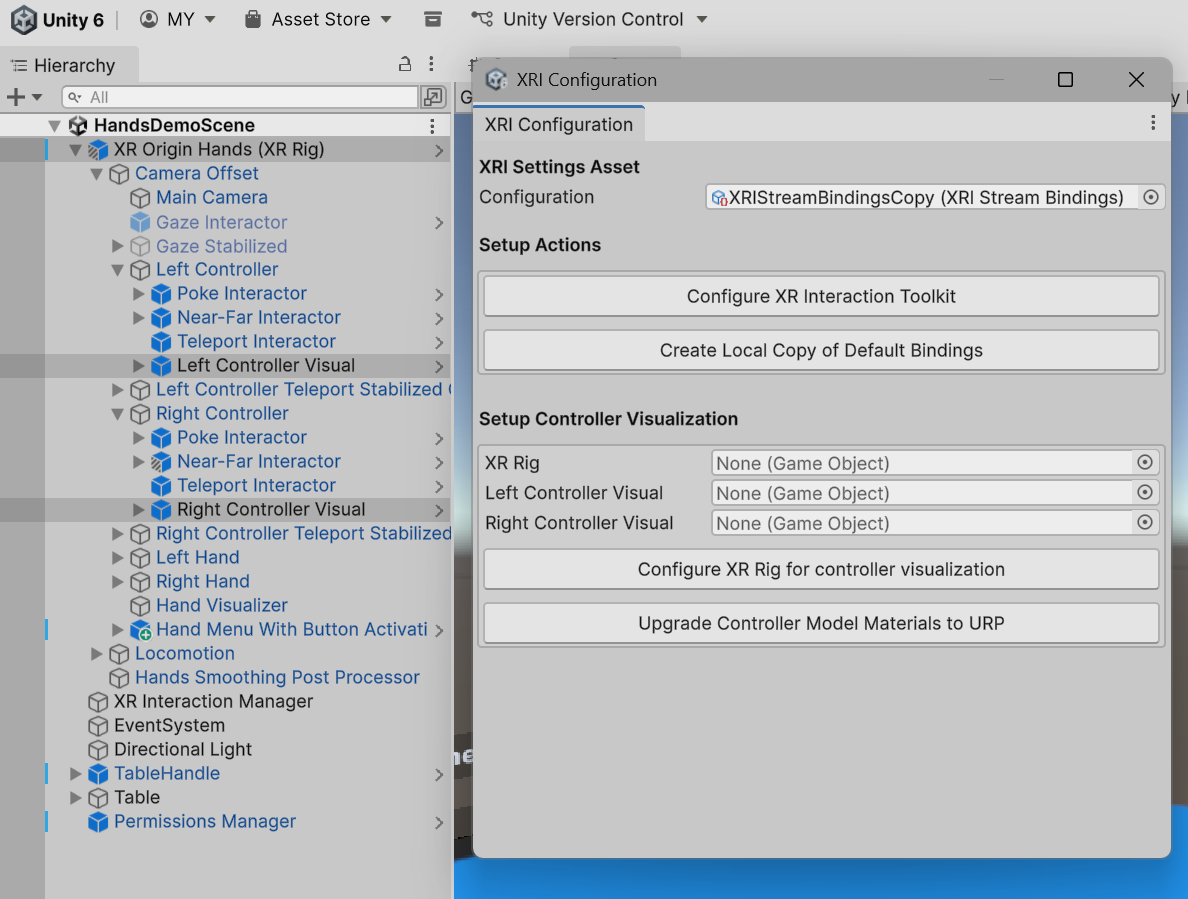
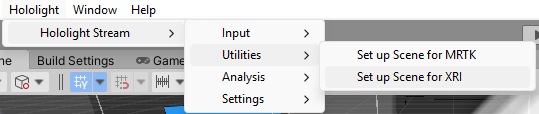
Select Hololight > Hololight Stream > Utilities > Set up Scene for XR Interaction Toolkit. The Hololight Stream XRI Configuration window will appear.
-
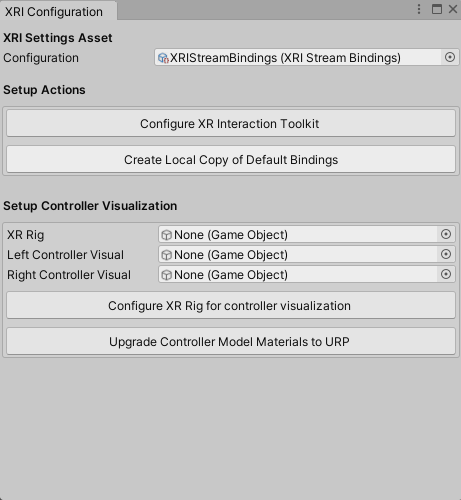
In the Hololight Stream XRI Configuration window, select Configure Input Bindings > Configure XR Interaction Toolkit Actions.
You can now use hand tracking and controllers with supported devices with Hololight Stream.
| If you have more than one Input Action Asset in the scene, the configuration might not work correctly, since In this case check out steps one through three on Customize Hololight Stream action bindings system. |
For more information on how to customize controller binding action paths, check out Customize Hololight Stream action bindings system.
For information on how to use models in your application that match your controller in the scene, check out Set up controller visualization.
Customize Hololight Stream action bindings system
To use hand tracking you need to add Hololight Stream input action bindings to your Scene’s active Input Action Asset. The Hololight Stream XR Interaction Toolkit configuration tool can find the active input action asset in the scene and add the needed bindings automatically.
To change the default inputs:
-
Select the active input action asset in the scene.
-
Add the Hololight Stream input binding paths where you need them.
To adjust the Hololight Stream XR Interaction Toolkit automatic configuration process:
-
Select Hololight > Hololight Stream > Utilities > Configure Scene for XR Interaction Toolkit.
-
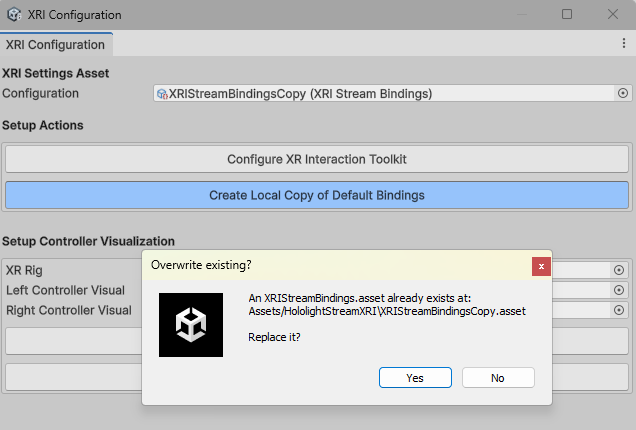
Select Configure Input Bindings > Create Local Copy of Default Bindings. This creates an "XRI Stream Bindings Asset" at "Assets/HololightStreamXRI/XRIStreamBindingsCopy.asset".
-
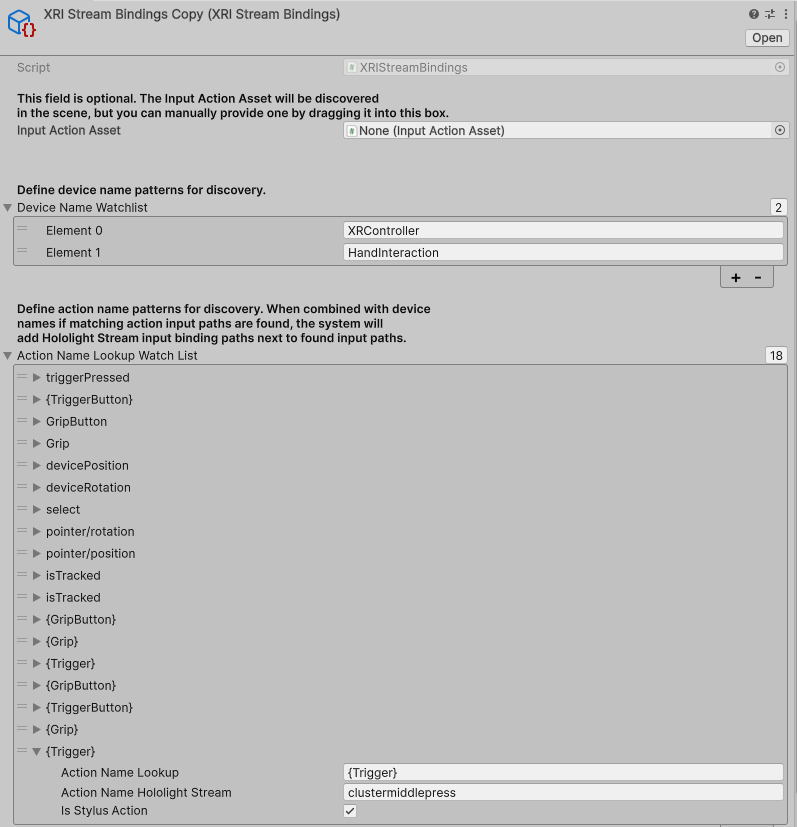
In the Project, select XRIStreamBindingsCopy.asset.
NOTE: The configuration process will automatically use the first Input Action Asset it finds. If you want to update a specific Input Action Asset, with your XRI Stream Bindings asset selected, you can then drag one into Input Action Asset at the top of the inspector. -
If you want to add a new "Device Name", select Device Name Watchlist > +. Enter the name you want automatically checked.
-
If you want a new "Action Name", select Action Name Lookup Watch List > +.
If the action you are trying to add belongs to the Logitech stylus devices, be sure to check the "Is Stylus Action" checkbox. -
When you are finished setting up the "XRI Stream Bindings Asset", select Hololight > Hololight Stream > Utilities > Configure Scene for XR Interaction Toolkit.
-
Select Set Up Input Bindings > Configure XR Interaction Toolkit Actions.
For more information on action bindings, check out Unity’s page, Action Bindings.
Set up controller visualization
Hololight Stream can adjust the XR Rig in the scene to remove the generic XRI controller model and add the controller model of the currently used device instead.
-
Select Hololight > Hololight Stream > Utilities > Set up Scene for XR Interaction Toolkit. The Hololight Stream XRI Configuration window will appear.
-
Under "Set Up Controller Visualization" there are 3 empty GameObject fields. Drag and drop the "XR Origin (XR Rig)" object from your scene’s hierarchy into the XR Rig.
-
In the scene go to XR Rig > Camera Offset > Left Controller > Left Controller Visual. Drag and drop the "Left Controller Visual" object into the Left Controller Visual field in the Inspector. Then go to XR Rig > Camera Offset > Right Controller > Right Controller Visual. Drag and drop the "Right Controller Visual" object into the Right Controller Visual field.
-
Select Configure Controller Visualization > Configure XR Rig for Controller Visualization.
-
If your project is using the Universal Render Pipeline, you need to select Configure Controller Visualization > Upgrade Controller Model Materials to URP. Now the materials will render correctly.