Import NavVis files into Hololight Space
Prerequisites
-
Hololight Space installed on your computer.
-
Hololight Stream Client installed on your supported XR device.
-
NavVis IVION on your Windows computer.
-
Blender on your Windows computer.
Import NavVis files
This workflow guides you through converting .e57 and .ply point cloud files into 3D meshes for XR visualization in Hololight Space. You’ll use NavVis to crop and export the scan, CloudCompare to generate and refine a mesh from the point cloud, and Blender to assign materials and restore textures. The process results in a .glb or .glTF file that can be imported into Hololight Space and explored interactively in XR.
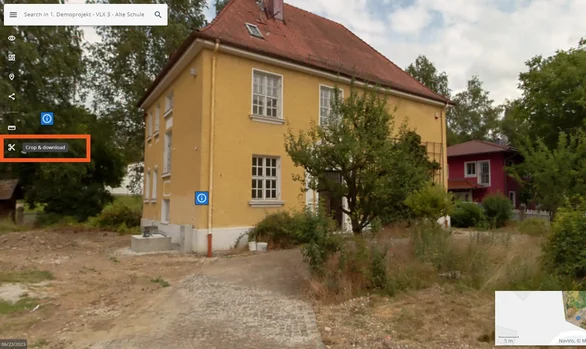
Step 1: Download scan from NavVis
NavVis IVION is a reality capture software used to record, view, and process 3D point cloud data. In this workflow, you’ll use NavVis to crop and export the desired area of your scan.
-
Start NavVis IVION.
-
Crop and download your point cloud.
-
Select your area.
-
When finished, select Download.
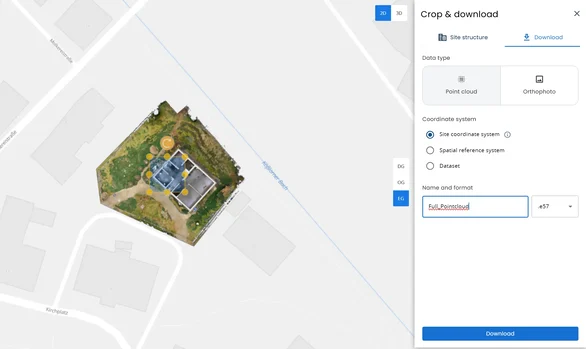
-
Name your file.
-
Select the .e57 format. The export process can take some time depending on file size. You can also use .ply, which exports faster.
Your exported .e57 or .ply file now contains the 3D point data that you’ll convert to a mesh in CloudCompare.
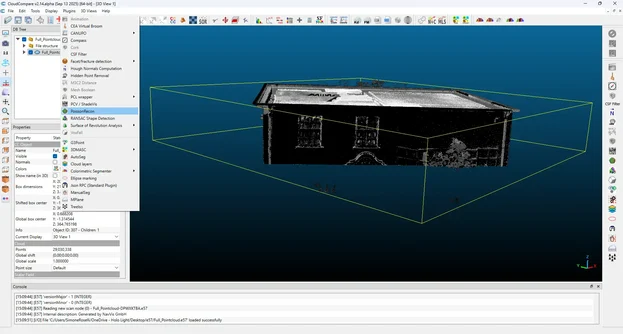
Step 2: Process point cloud in CloudCompare
CloudCompare is an open-source 3D point cloud and mesh processing software available for Windows, macOS, and Linux. It’s widely used for converting dense point clouds into polygonal meshes, cleaning data, and optimizing models for 3D visualization. In this article CloudCompare v2.14 alpha was used.
Convert point cloud to mesh
-
Open CloudCompare
-
Drag and drop your .e57 file into the workspace.
-
Select the point cloud in the hierarchy panel.

-
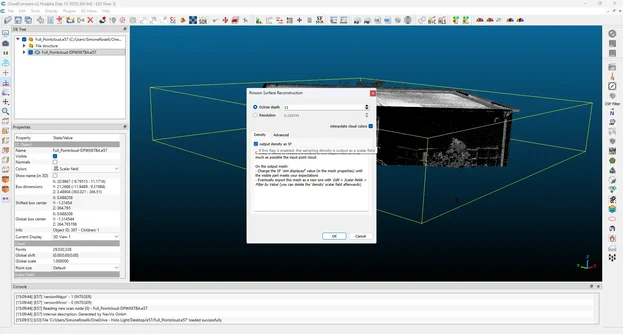
Go to Plugins > PoissonRecon
-
Depth defines the level of detail in the scan.
-
Set Depth to 11 for balanced quality and performance. This helps with later optimization.
-
Enable SF output density.
-
In Advanced, set Sample to 5.
-
Keep all other settings as default.
-
-
Select OK.
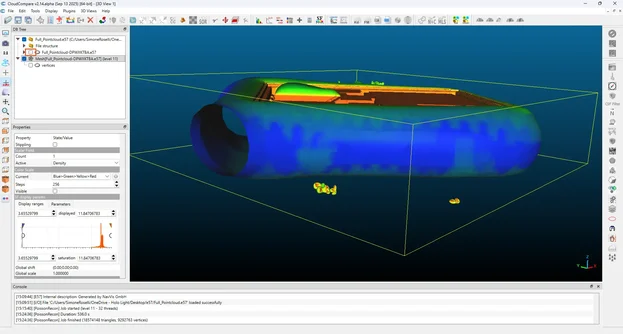
The original point cloud remains unchanged and a new mesh appears in the hierarchy. Disable the visibility of the original point cloud for better performance.
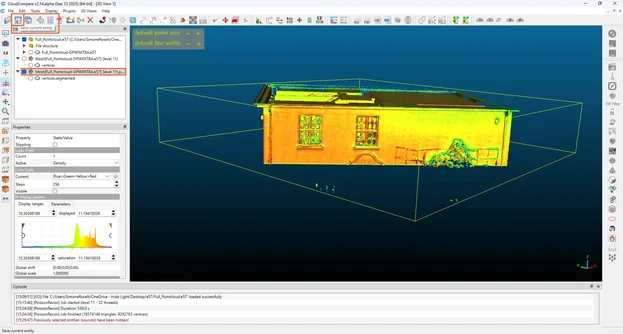
Refine the mesh
-
You now have a mesh created from the point cloud.
-
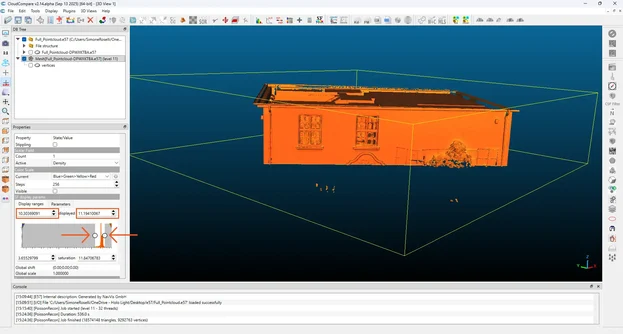
In the properties panel, scroll down to the SF display params section.
-
The orange graph shows where the mesh was detected.
-
Drag the left point of the slider to align with the orange curve.
-
Drag the right point of the slider to align with the other side of the orange curve.
-
Try to drag the pointers as close to the graph as possible.
-
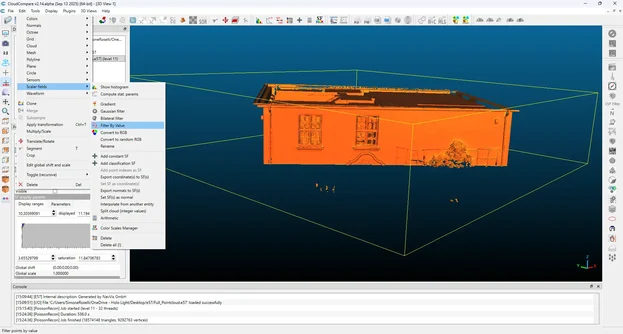
Go to Edit > Scalar Fields > Filter by Value.
-
The parameters should automatically adjust to the new values you set with sliders otherwise copy and paste the same parameters you see in the graph.
-
Select Export. The export may take several minutes. A second mesh object is then created. The new mesh should be automatically selected. If not, select the new mesh.
-
Save the current entity.
-
Name your file.
-
Choose .ply as the export format.
-
Save the file.
Step 3: Assign materials and textures in Blender
Blender is a professional, open-source 3D creation suite used for modeling, texturing, animation, and rendering. In this workflow, Blender is used to assign materials and textures back to the newly generated mesh before importing it into Hololight Space.
Please follow the official Blender installation guide to download and install Blender on your computer.
This workflow was created using Blender 4.5.1 LTS.
-
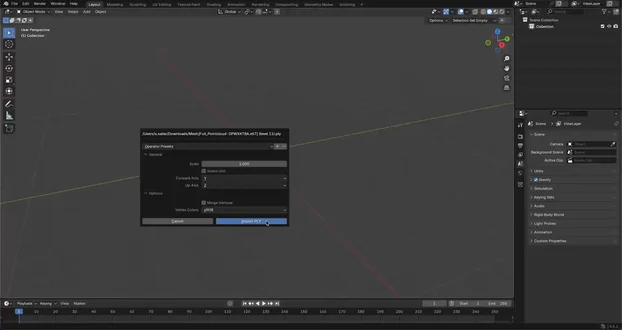
Import the mesh.
-
Open Blender.
-
Delete all objects in the scene.
-
Press A, then Delete, and confirm with Enter.
-
Drag and drop your saved .ply file into the scene.
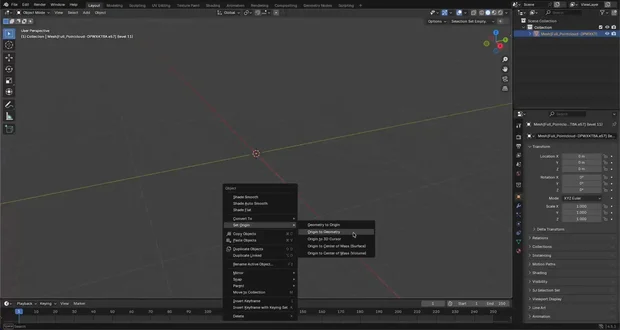
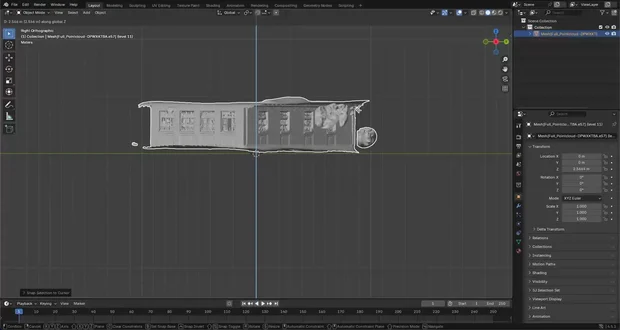
Adjust the mesh position (if not visible)
In some cases, the mesh origin may be incorrect after import, making it invisible in the current scene. Follow these steps to place the mesh at the origin (0, 0, 0):
-
Select your mesh.
-
In the viewport, right-click and select Set Origin > Origin to Geometry.
-
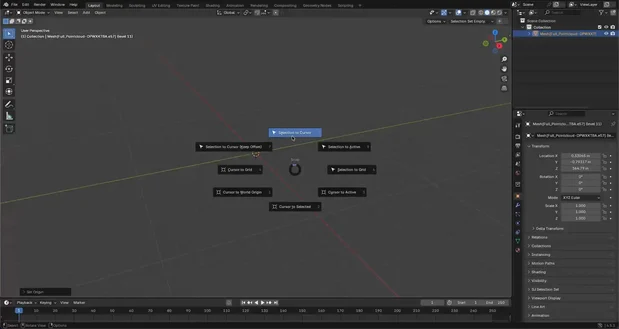
Press Shift + S, then select Selection to Cursor.
-
Your mesh is now positioned at 0, 0, 0.
-
Adjust the mesh in height by selecting the X axis In the top-right gimbal.
-
Press G + Z, then move the mesh up or down until it aligns with the floor.
Assign materials to the mesh
Now you’ll assign a new material to the mesh to restore its visual appearance.
-
Select your mesh.
-
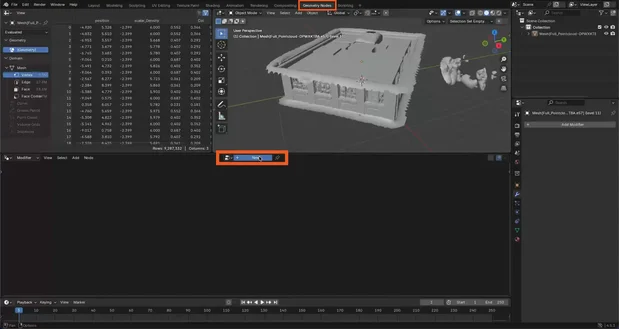
At the top of the interface, navigate to Geometry Nodes.
-
Select New to create a new node setup.
-
In the node editor, press Shift + A and type "Set Material".
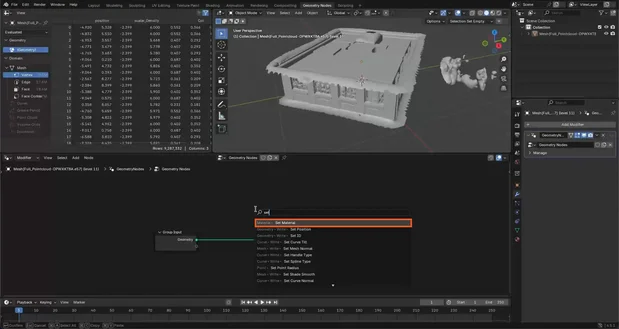
-
Insert the Set Material node between Group Input and Group Output.
-
In the Properties panel on the right, select Materials.
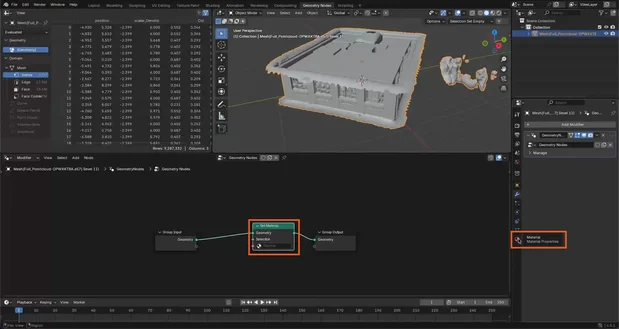
-
Select New, then name your new material.
-
Make sure the mesh is still selected. Back in the node editor, assign the same material name in the Set Material node or select it from the drop-down list.
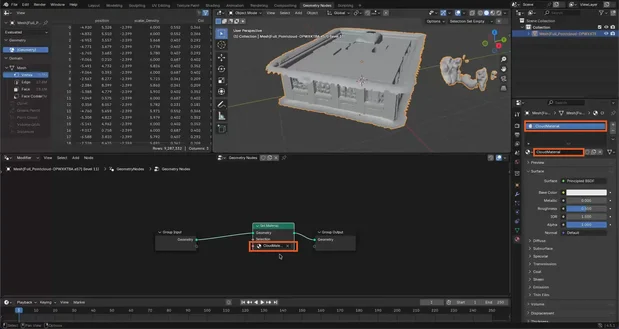
Your mesh now recognizes and references the new material.
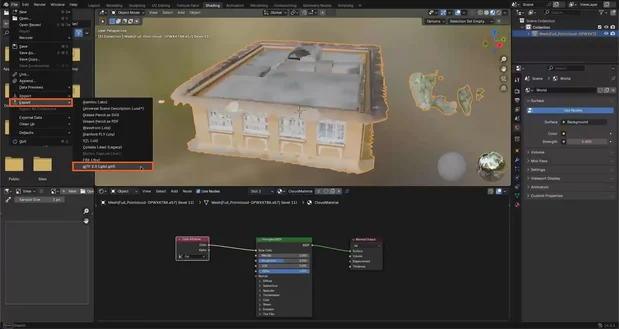
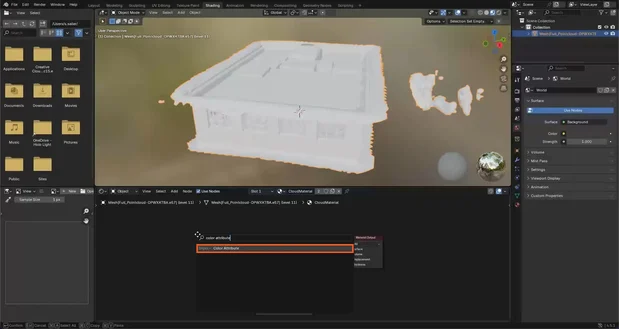
Restore color attributes
Next, you’ll reapply the original color attributes so the mesh regains its textures.
-
Navigate to Shading in the top panel.
-
In the node editor, press Shift + A and type "Color Attribute".
-
Add this node next to the Principled BSDF node.
-
In the Color Attribute field, select Col.
Your mesh now displays its original colors and textures.